Hilarious video of our 2014 road trip to 22 states and 15 national parks...


MaxxAir MaxxFan Installation Guide
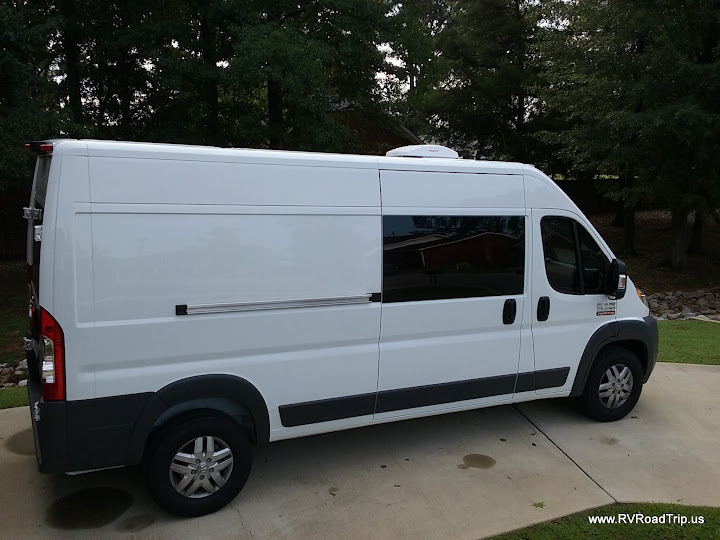
If you are looking for the index page of this project, click here.As of this writing, we are converting our new 2014 Ram ProMaster 2500 van into a camper van. One of the things we wanted to add was a roof vent for ventilation. We are familiar with the Fantastic Fans and they are great products, but we wanted one we could leave open all the time without worrying about rain getting in. The clear choice is the MaxxFan by MaxxAir. We had installed a model 5100K into a previous camper we owned and were very pleased with it. The 5100K is the manually operated unit without a remote. This time we opted for the 7000K model which has a remote control and opens and closes automatically. The difference in price is about $50. Here is a picture of the fan right after we took it out of the box it came in.

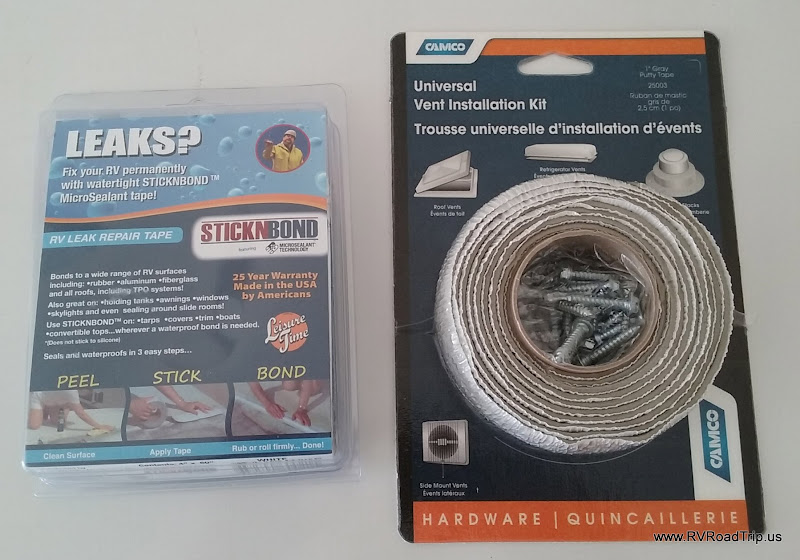
The fan comes with everything you need to install except for sealant. We opted to use butyl tape and Eternabond. Some people use Dicor lap sealant instead of Eternabond. We prefer Eternabond as it lasts about 25 years whereas Dicor needs to be checked every year and replaced every few years. Yes, we know people who had Dicor on their RV roof for 10 years with no leaks... grats on being lucky. We prefer not to leave the risk of water intrusion to luck. You will need a drill and bit, jigsaw with the appropriate blade type (metal or wood), roller for the Eternabond, marker, primer paint and an assistant is also nice. I had a very cute one named Cynthia. She was mainly there to call 911 in case I fell off the roof of the van. Thankfully, I did not fall.
This roll of Eternabond is more than you will need, but you really should have some of this on hand at all times. You only need a little over 5 foot of Eternabond. If you have a 4" wide roll, you can cut off about 64" and then cut that into two 2" strips, then cut each of those in half... or you can just cut enough to use a 4" strip on each side. It's your choice, you'll have plenty of Eternabond to do it either way. We found this 4" x 60" pack of Eternabond locally (pictured below), so we went with that instead of a 50' roll.
Now that we have everything we need, we can begin.
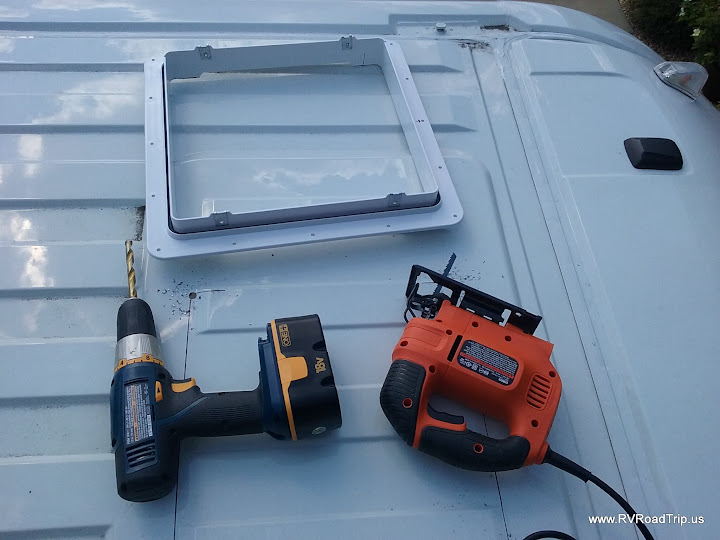
Step 1 involves cutting a hole in the roof of the van. There is no need to be intimidated about cutting a hole in your roof, just be darn sure you mark the right location! We placed the mounting frame that came with the fan onto the roof and centered it, also marking which way was towards the front. We then took a Sharpie and drew a line all the way around the frame.
Bonus Tip: Get a large piece of plastic such as Visqueen and hang it inside your RV below where you will cut the hole. This will catch any debris the falls and you won't have a huge mess to clean up afterwards. Our roof is metal so this caught all the metal shavings, all 1,543,106 of them!
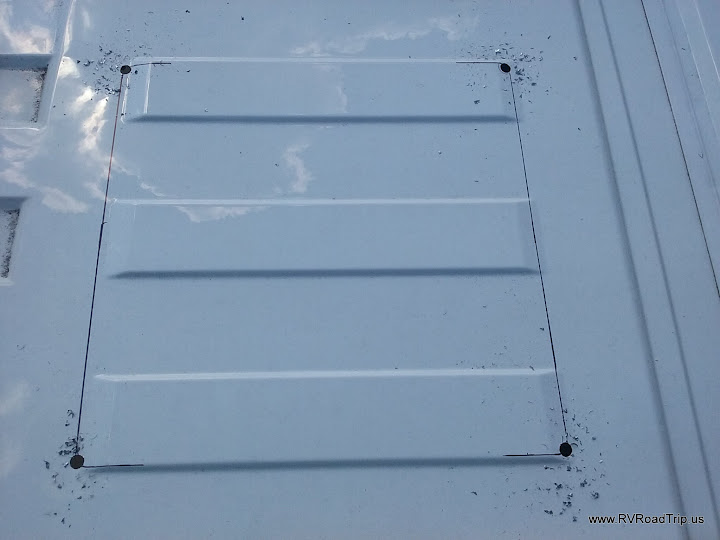
Now you get to make your first holes in the roof. Double and triple check check that you marked the spot for the fan correctly and that there is nothing in or under your roof that you will damage when you starting drilling and cutting. You know, things like wire, A/C ducts, etc. Drill a hole at each corner. The holes need to be large enough for the jigsaw bit to fit into so you can start cutting. Here's what that looks like.
Now insert the jigsaw blade into a hole and follow your lines carefully. It is OK if you veer off a little but do your best to make straight cuts right at your lines. Once you get your square cut out, make sure the fan mount fits in properly. Make any trimming adjustments necessary. Once your are sure it fits, clean the area with acetone and paint any bare metal edges with primer. If you have no metal, then you won't need to worry about that part. Flip over the fan mount and run a solid layer of butyl tape on every side making sure to not leave any gaps. You can press it together with your finger to fill and spaces. Once you have that in place, put the mounting frame into the hole making sure it is facing forward. Remember the mark we made earlier? Use the screws that came with the fan and screw the mount in place. Do not over tighten the screws as you can crack the frame. Just tighten them to the point where a little of the butyl tape starts to squeeze out. Take a flat tip screwdriver or putty knife and remove any of the butyl tape that squeezed out. Clean the edges again with acetone if necessary. Here is a picture of our mount ready to be screwed down. Notice the little arrow indicating which way is front!

Our van has a very thin metal roof so we had to place 1" x 2" braces underneath for added support. The screws from the top went right into this wood. This will be surrounded by insulation and covered so it doesn't have to be a show piece. Here is what that looked like.

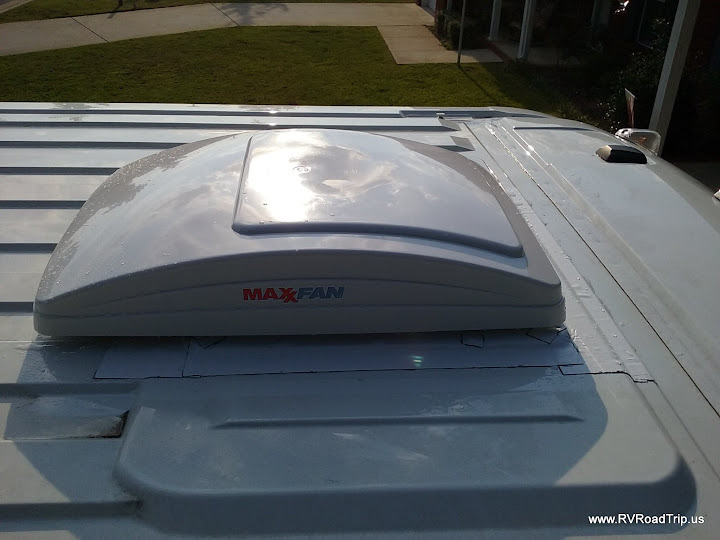
Now open the fan all the way using the manual knob. Place the fan into the mounting frame and screw in the 2 screws on each side. Be sure to dangle the power wires down through your hole before doing this otherwise you won't be able to get to them. Once your interior is cleaned up and ready, install the inside shroud so it looks all nice and purty. You will no doubt need to trim the shroud based on your roof thickness. The paperwork that comes with the fan tells you exactly how to do this. That's it! Your new MaxxFan is installed and ready to be hooked up to 12v. Here is what ours looks like from the roof. We were generous with the Eternabond as we wanted to be darn sure it would never leak in our lifetime.