Hilarious video of our 2014 road trip to 22 states and 15 national parks...


Jack Digital TV Antenna Installation Guide
Our motorhome came with a bat wing style antenna made by Antennatek, apparently a knock-off of the Winegard Sensar III antenna. Being it was a knock-off, we could not add the Winegard Wingman to increase HD reception so it was either replace it with a Winegard Sensar IV or go with the Jack Digital Antenna from King Controls. We opted to go with the Jack antenna.You have 2 options with the Jack antenna, one is a complete replacement of your bat wing and mast... the other is simply a head replacement, keeping your mast. Since we didn't want to deal with raising and lowering the antenna or risk forgetting to lower the antenna and driving away, we chose the full replacement unit. For colors, you have a choice of white or black, we chose white.

Installation started with the removal of the old bat wing antenna. Luckily it was in a convenient location near the side of the RV so I was able to do everything from a ladder. I'd rather not walk on the roof any more than I have to. I started off by removing the four screws that hold the rotating handle to the ceiling. A small set screw allows the handle to come right off.

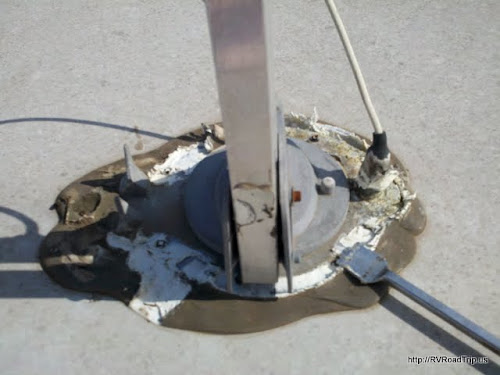
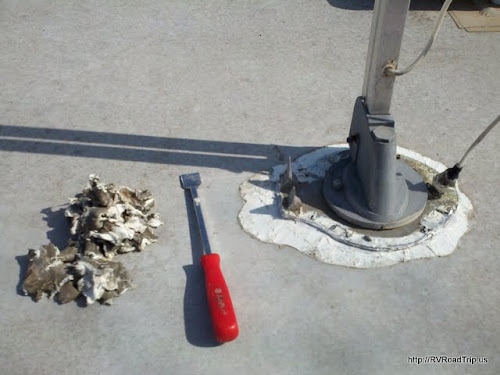
Now it was time to head to the roof. I raised the antenna so it would be out of the way and began to scrape off the old Dicor lap sealant. Once I started, I found out just how poorly it had been applied. Thankfully, they used butyl tape and that prevented a leak! I used a gasket scraper to remove the Dicor since that is what I had handy. Whatever you use, just be sure not to snag the roof membrane.
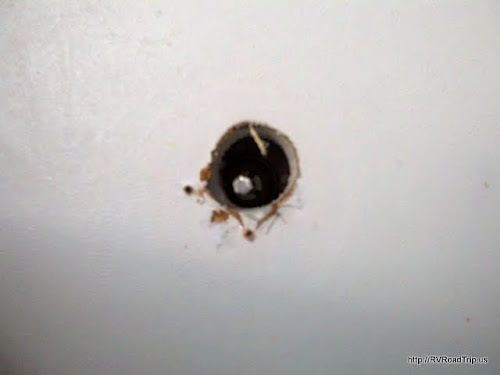
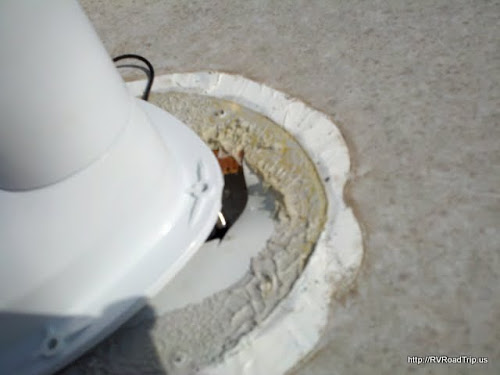
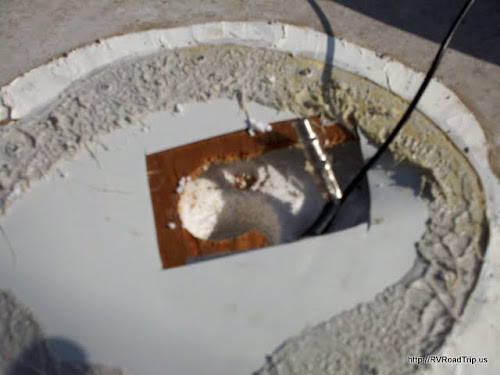
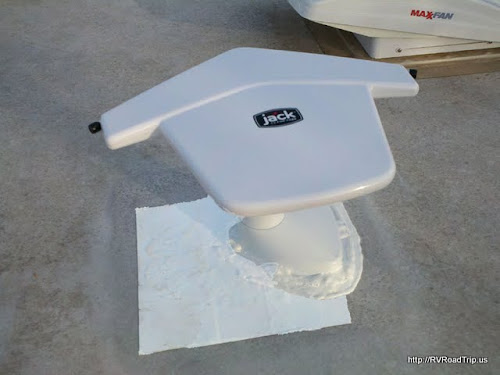
Once the Dicor was out of the way, I found 8 screws holding the antenna in place. I removed these and set them aside for use with the Jack antenna. The Jack does not come with mounting screws for use on the roof. Once the screws were out, I pried the antenna off of the butyl tape and unscrewed the coax cable. As you can see in the next picture, the builders at Gulf Stream did a horrible job of cutting the hole for the antenna. I mean, seriously, how hard is it to use a hole saw? If RV manufacturers would take pride in what they build, they might stop going bankrupt.
The Jack antenna comes with a square plastic shaft that goes through the hole in the roof so you can rotate it from the inside. It requires a 1.75" to 2.5" hole. Of course, the hole in my roof was 1.5" so I had to enlarge it. That was a pain to do since I could not use a hole saw, I had to use hand tools to trim it evenly on all sides. The square plastic shaft that comes attached to the antenna is suited for a roof with a thickness of 3.25" or less. Of course, my roof is 3.5" thick so I had to remove that one (it just pulls off) and use the longer one that came in the box. The rotating knob inside will attach to this so it has to be the right length.
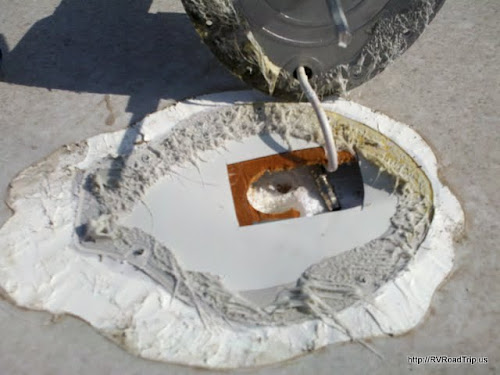
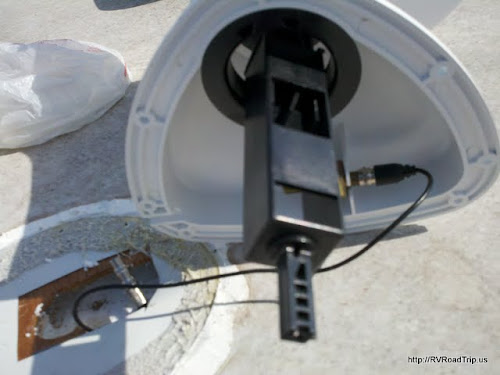
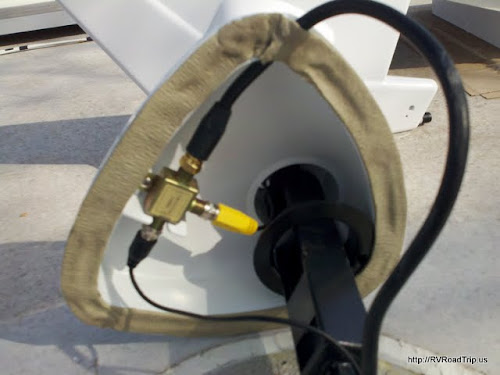
I also had to drill a 1/4" hole next to the 1.75" hole for the coax cable to feed through. The antenna itself has a splitter in the head unit with an input from the antenna itself and 2 outputs. One goes to the signal meter and the other goes to the signal booster. You can almost see the splitter in the next image, but there is a better shot of it further down the page.
When you mount the antenna to the roof, it is supposed to face forward but with the gigantic hole Gulf Stream cut in the roof, I was not able to mount it this way. I tried, but as you can see in the next picture the antenna would not cover the hole. Shame on you Gulf Stream for shoddy workmanship.
This next picture is the coax connection going to the booster inside. I had to get a short piece of coax to go between the antenna and this wire since there was absolutely no slack in it whatsoever. Thankfully, I had a piece handy.
Next I applied some new butyl tape (which I always have on hand) to the jack antenna and positioned it in the hole in the roof. I made sure the square shaft would rotate freely without hitting the edges of the hole. Once I was satisfied with the position, I pressed the antenna down but did not yet use any screws. I went inside and attached the cover plate to the ceiling, making sure the shaft was centered in the opening. I put the knob you use to rotate it with on the shaft and made a full sweep making sure it didn't hit the sides. I attached the coax to the signal meter and pressed the cover into place. I went back to the roof and screwed the antenna down.

Back inside the RV, I removed the old signal booster and put the Jack booster where it was. The Jack antenna would not work for me with the old booster but did work just fine with the one that came with the antenna. Not sure why that was, they look very similar but obviously they are different. One thing I did not like about the new booster is that it does not have a cigarette plug on it like the old one did. We use that for a 12v fan so we'll be wiring that back up tomorrow.
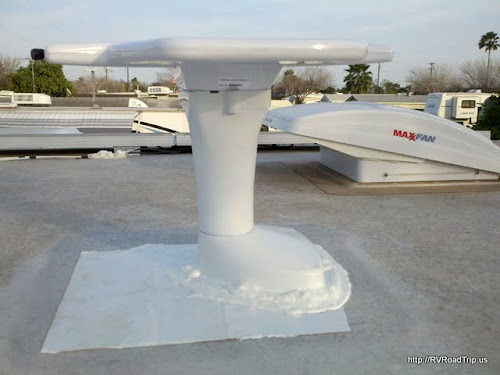
I went back on the roof and covered the area where the old antenna was mounted with Eternabond (which I always have on hand). I also ran a bead of Dicor around the Jack antenna as it really wasn't feasible to use Eternabond. Here's the antenna installed and pointing towards the local TV towers. Total installation time was about 2 hours, much of which was spent slightly widening the silly hole the square shaft went through. The middle image below shows how tall the antenna is compared to other things on the roof. It is not quite as tall as the A/C but that's OK... I don't think that it will interfere with reception at all.

The antenna works extremely well! We are very, VERY pleased with how good the picture looks now as compared to what we had with the old bat wing. If you want to swap out your antenna for one of these, use the links at the beginning of the article and get you one.